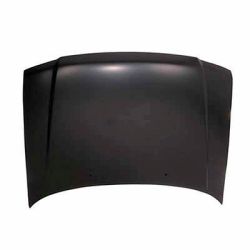


Replacing your car's hood might seem like a major task, but it's often a straightforward and worthwhile fix - especially if the current one is damaged, rusted, or simply outdated. Beyond restoring safety and protecting the engine bay, a new hood can significantly improve your vehicle's appearance and resale value, especially with the wide range of hood upgrades on the market.
In this guide, we'll walk you through everything you need to know in order to successfully replace your car's hood by yourself - from recognizing when it's time for a replacement to doing the job right, step by step.
Signs That Indicate Hood Replacement is Necessary
How can you tell it's time to replace your car's hood? There are several telltale signs that vehicle owners should be aware of.
Dents and damage
Start by closely examining the surface for any significant denting. While small dents might be repairable with paintless dent removal techniques, larger or numerous dents can compromise the structural integrity of the hood. This is particularly true if the dents are located near critical areas like the latch zone or hinge mounts, which can affect safety during driving.
Rust Buildup
Next, conduct a rust inspection. Even if the exterior paint appears intact, rust can form underneath the surface and spread over time. Look around seams, hinges, and the underside of the hood-areas where water and road salt often collect. Advanced rust can weaken the hood's structure, making it a safety hazard, especially during a collision.
Functional Issues
Functional problems are another major indicator. If you notice difficulty in opening or closing the hood, misalignment with the fenders, or a hood that doesn't latch securely, it's time to take a closer look.
These issues may be a result of previous damage (such as a minor front-end accident) or wear in the hinge or latch system. Replacing the hood can restore proper function and ensure your engine compartment is sealed correctly.
Aesthetic Wear and Tear
Lastly, consider the aesthetic aspect. A hood with fading paint, peeling clear coat, or visible warping detracts from the overall appearance of your vehicle. For car owners looking to maintain resale value or simply preserve the vehicle's curb appeal, a hood replacement is a smart investment.
Tools and Materials Needed for Hood Replacement
Identifying the need for a hood replacement is only the first step. Equipping yourself with the correct tools and materials is crucial for a smooth and safe installation process.
Start with basic hand tools such as:
- Flathead and Phillips screwdrivers
- Socket wrench set (with extension bars)
- Open-end or adjustable wrenches
- Pry bar or trim removal tool (for detaching insulation or moldings if needed)
In addition, safety equipment is a must:
- Mechanic's gloves for grip and protection against sharp edges
- Safety goggles to shield your eyes from dust and debris
- Protective clothing to prevent scratches and bruises
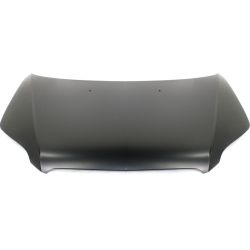
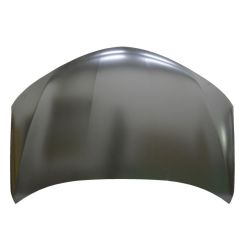
When it comes to replacement parts, choosing the right hood type is essential. OEM (Original Equipment Manufacturer) hoods are typically more expensive but ensure an exact fit and factory-quality materials. Aftermarket hoods, on the other hand, offer customization opportunities-such as carbon fiber or fiberglass variants-which may reduce weight or enhance styling but might require more adjustment during installation.
Don't forget auxiliary components like:
- Hood lift supports (struts) - old ones often lose pressure and should be replaced with the hood.
- Hinge and latch hardware - especially if the existing parts show signs of wear or rust.
- Touch-up paint or protective coating - if needed, to match or protect the replacement hood.
Pro tip: Lay out all your tools and parts ahead of time in a clean, organized space. This preparation minimizes downtime and prevents the risk of missing or misplacing small hardware.
Step-by-Step Guide to Replacing the Hood
Once you have everything ready, follow these detailed steps to ensure a successful hood replacement.
Step 1: Prepare the Vehicle
For the preparation of your vehicle, you need to consider the following:
- Park on a level surface and engage the parking brake.
- Disconnect the negative battery terminal to avoid accidental electrical contact.
- Prop the hood up with a support rod or a helper to prevent sudden closure.
Step 2: Remove the Old Hood
Before removing the old hood, keep in mind the following steps:
- Detach any under-hood insulation, washer fluid lines, and hood light wiring (if applicable).
- Have an assistant hold the hood while you remove the bolts from the hinges using a socket wrench.
- Carefully lift the hood away and set it aside on a padded surface to avoid damaging it further.
Step 3: Install the New Hood
Here is what you need to know:
- With the help of an assistant, align the new hood with the hinge mounts.
- Insert bolts and hand-tighten them first to allow for alignment adjustments.
- Reconnect any components removed earlier (lights, washers, insulation).
- Once alignment looks correct, tighten bolts with a torque wrench to the manufacturer's specifications.
Be especially mindful of hood materials. For example:
- Steel hoods are sturdy but heavy-always lift with care.
- Aluminum hoods are lighter and resist rust but can be more prone to warping if overtightened.
- Composite hoods (e.g., carbon fiber) often require careful handling to avoid cracking.
Adjusting the New Hood
With the hood installed, it's crucial to verify proper alignment and operation.
Check Hood Gaps
Here it's important to consider the following:
- Ensure even spacing between the hood and surrounding panels (fenders, grille, and windshield cowl).
- Uneven gaps may suggest misaligned hinges or an improperly seated latch.
Test the Latch Mechanism
Before testing the latch mechanism, we advise to consider the following steps:
- Gently close the hood and see if it latches securely.
- If it doesn't close evenly or requires excess force, adjust the latch mechanism or the rubber bump stops under the hood.
Inspect Hinge Movement
Here is what you need to know:
- Open and close the hood several times, listening for creaks or binding.
- Lubricate the hinges if needed and re-tighten bolts after final adjustments.
Verify Hood Support
In order to verify the hood support, you need to consider the following:
- Ensure the hood stays up when lifted. Replace struts or a manual prop rod if it sags or drops unexpectedly.
Proper alignment ensures the hood seals the engine bay from moisture and dirt, prevents wind noise, and protects internal components during driving.
Common Mistakes to Avoid
Hood replacement is a relatively straightforward process, but several mistakes can undermine your effort:
- Skipping safety steps: Always disconnect the battery before working near electrical components or sensors. Also, never attempt to remove a hood alone-it's too heavy and awkward without assistance.
- Incorrect hood fitment: Not all hoods are interchangeable across trims or model years. Always double-check compatibility using your car's VIN or consult with the parts supplier.
- Forgetting to transfer accessories: Sensors, insulation, washer nozzles, and emblem badges often need to be moved from the old hood to the new one. Keep track of all components and reinstall them carefully.
- Rushing alignment: Misaligned hoods don't just look bad-they can cause latch failure, wind noise, or even hood flutter at high speeds. Take the time to adjust perimeter gaps, test closures, and refine placement before final tightening.
- Neglecting corrosion protection: After installation, apply rust-proofing spray or anti-corrosion treatment to bolt threads and seams-especially if you're working in a wet or salty climate.
Final Thoughts
Replacing your car's hood might seem like a daunting task, but with the right tools, preparation, and attention to detail, it becomes an achievable and rewarding DIY project. From spotting the early signs of damage to performing final latch checks, every step you take enhances not only your vehicle's appearance but also its safety and functionality.
Your car now benefits from improved structure and refreshed style-and you've deepened your hands-on automotive skills in the process. Drive confidently, knowing you've tackled a key aspect of vehicle maintenance head-on.
Frequently Asked Questions
How Long Does a Hood Replacement Typically Take?
- You're wondering about the replacement duration. Labor estimates for hood replacement typically range from 1 to 3 hours, depending on your experience and vehicle model. With proper tools and help, it's manageable within that time frame.
Can I Use a Used Hood Panel for Replacement?
- Did you know used parts can cut costs by up to 50%? You can definitely use a used hood panel for replacement. Just make certain it fits your vehicle's specifications for proper alignment and functionality.
How Do I Choose Between OEM and Aftermarket Hoods?
- Choosing between OEM and aftermarket hoods is like picking the perfect paintbrush. OEM benefits offer a seamless fit and quality, while aftermarket options provide a palette of customization, from lightweight materials to unique designs.